QF-Test is a comprehensive test automation solution built for Web, Desktop, Java-based, and Mobile applications, with a focus on long-term maintainability and enterprise-ready reliability. With the launch of QF-Test 10, AI-driven capabilities are now integrated directly into your testing workflow. This post shows how to connect GitHub Copilot to QF-Test using a simple custom model and the Copilot CLI.
Usually in QF-Test, AI providers are set up via Options → Artificial Intelligence → AI Configurations. GitHub Copilot is an exception because it doesn’t expose a standard API endpoint with a URL. Therefore, you cannot add Copilot in Options → Artificial Intelligence → AI Configurations. The good news: you can still integrate Copilot by registering your own custom model in QF-Test that calls the GitHub Copilot CLI.
What you’ll need
- QF-Test 10 or later.
- Access to GitHub Copilot and GitHub Copilot CLI. As of now, a free GitHub account on the « Free » Copilot plan is enough to experiment with the Copilot CLI.
- Basic familiarity with scripting in QF-Test.
Step 1: Install and configure the GitHub Copilot CLI
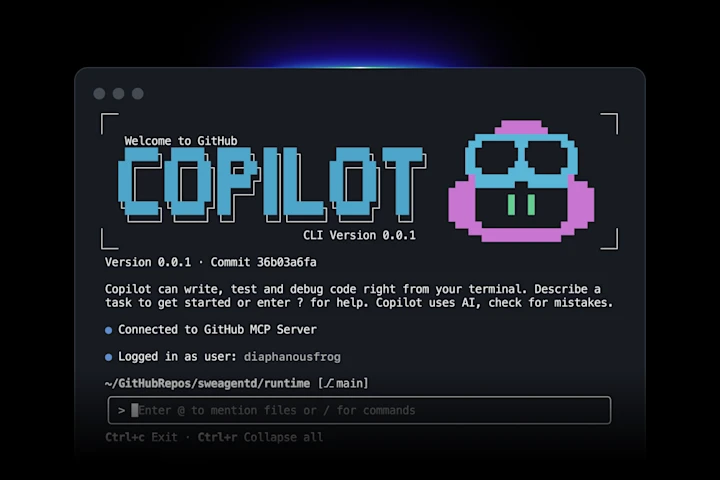
- Install the GitHub Copilot CLI
Follow the official instructions - Log in from your Terminal
Runcopilot login - Verify it works
Try a quick prompt:copilot --prompt "Hello World"
If that prints a response from Copilot, you’re ready to connect it to QF-Test.
Step 2: Wire Copilot into QF-Test via a custom model
We’ll use ai.addCustomModel in a Server Script so QF-Test can talk to Copilot by launching the CLI as a subprocess. In QF-Test:
- Create a new Server Script node (language: Groovy).
- Paste the code below into the script.
- Adjust the path to the
copilotexecutable./opt/homebrew/bin/copilotwill only work if Copilot CLI was installed via Homebrew on macOS. - Run the script node.
ai.addCustomModel("GitHub Copilot", (msg) -> {
    def cmd = [
        "/opt/homebrew/bin/copilot",
        "--silent",
        "--stream", "off",
        "--model", "claude-sonnet-4.5",
        "--prompt", msg
    ]
    def proc = cmd.execute()
    proc.outputStream.close()
    proc.waitFor()

    return proc.in.text.replace("● ", "")
})

println(ai.ask("What is the answer to life, the universe and everything?", configName: "GitHub Copilot"))
What this does:
- Registers a LLM model named « GitHub Copilot » with the QF-Test AI integration.
- For each prompt (
msg), QF-Test starts the Copilot CLI and returns the CLI’s text output back to QF-Test. - Prints the result of a sample
ai.askcall in the QF-Test terminal.
Tip: You can change the model name passed to
--modelto your preferred Copilot model.
If you get an error saying Cannot run program "/path/to/copilot": error=2, No such file or directory, you must update the path in the first item in the cmd list to where the Copilot CLI is installed on your system.
If everything works, you can remove the println line at the end.
Step 3: Use Copilot with the QF-Test ai scripting module
Once the custom model is registered, you can use it from any script with ai.ask, for example:
def answer = ai.ask(
    "Generate a JSON string of test data in the following format: ...",
    configName: "GitHub Copilot"
)
rc.setLocal("data", JSON.parse(answer))
For more on the ai scripting module in QF-Test, see the QF-Test manual.
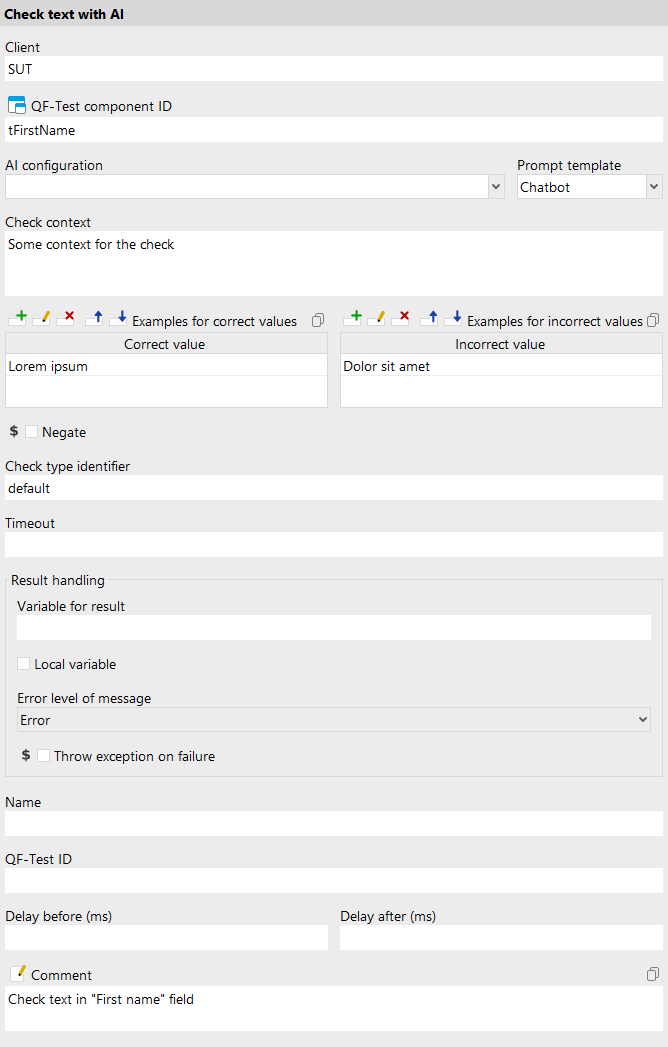
Step 4: Validate UI text with « Check text with AI »
You can also bring Copilot into your test checks. The « Check text with AI » node lets you have the AI verify UI elements in your application using natural language. In the node’s « AI configuration » field, « GitHub Copilot » should automatically appear in the dropdown.
That’s it! Even though Copilot doesn’t expose a standard URL+API key endpoint, you can still use it inside QF-Test by registering a custom model that calls the Copilot CLI. From there, ai.ask helps you validate and generate data right in your tests, and « Check text with AI » lets you validate UI content in plain language. Happy testing!
For more details on all AI integration options in QF-Test, see our free special webinar « When tests become intelligent: AI-driven checks with QF-Test »:
When tests become intelligent: AI-driven checks with QF-Test
In this special webinar, we’ll show you how to get the most out of the new AI integrations in QF-Test. With QF-Test 10, you can use AI to test non-deterministic UIs, validate UI components based on semantic criteria, generate test data, and much more.
